
Quick, Adorable Quilt Pattern (Update) and Information on the Janome MBX
I have been working on quilting the Mickey Mouse Baby Quilt I posted last week and I have to say, I have been going about it all wrong! The delay is because I have been searching for a line drawing of Mickey’s head that I could digitize with my Janome MBX Digitizer software and I couldn’t find what I wanted. Don’t get me wrong, there are LOTS of Mickey’s out there in free clip art but I knew exactly what I wanted and couldn’t find it.
Well, today the light went on. I know what you’re thinking, but it does happen occasionally. I decided to just use the MBX software and make the design I wanted myself!. Here it is and further down the page, I will tell you how I did it.
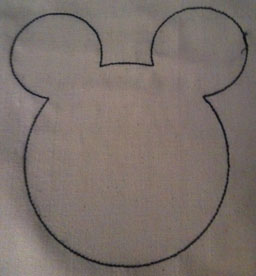 I am using this Mickey head as the quilting in the center of the quilt. It is a “triple running line” stitch.
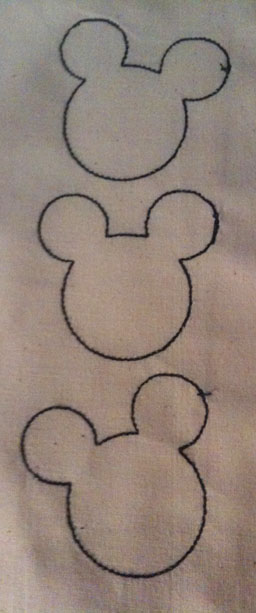 This is for the border. I have since changed this design. It was a bit to wide and I decided I wanted it to be a “single running line” stitch. The other change is that I decided to adjust the tilt of the top head to more closed match the bottom.
Below is a screen shot of the Janome MBX software. I will step you through how I made the above designs. By the way, I’m sure there are more straightforward ways of achieving the same results but this is what worked for me.
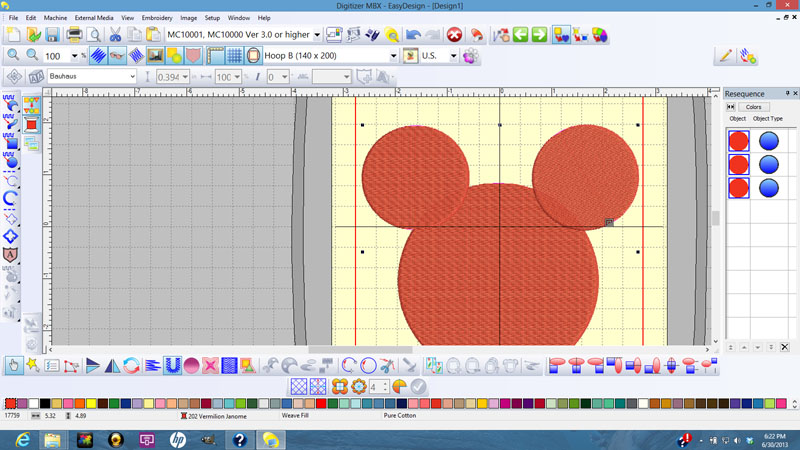
First of all, open a new window and select the “circle” tool on the left hand side (it’s the fourth button down – the solid filled circle), this will be the head. Don’t worry about the fill because you are going to delete it before you are done anyway. Draw your big circle to the size you need. Add two smaller circles for the ears and overlap them on the large “head” circle. Now, select the entire “head”, all three circles. Make sure you have little black squares around the entire “head”.
Next, select the “outline” button. It is in the fifth row from the bottom (first is the tool bar for your computer, next is a gray bar that shows the vitals of the design – thread color you have selected and the dimensions, next is the available thread colors, after that are two more gray bars with different function buttons – you want the top row). The “outline” button is the 13th button from the left. It is an orange outlined yellow square with an orange outlined green triangle in the bottom right hand corner. Press that button and you will be asked to select the type of outline you want. I used the triple running line and the single running line. The software will automatically apply the outline to the image that is INSIDE the little black squares. If you don’t get the entire image in the outline, hit the “undo” arrow at the top tool bar and start the process again.
After you have everything to you liking, you can select the “filled” circles on the right hand side of the screen in the area titled “Resequence” and delete each of the circles. This will leave the outlined head. Don’t worry about the color of thread you used for the outline, when you stitch it out, you can change that to whatever you want. Make sure you save your image in a file where you will be able to find it and you are finished!
As I have stated many times, the Janome MBX software is extremely powerful and there is a lot to learn in order to use it to its full potential. I am just beginning to be able to find my way around this beast and I have been working with it for several months now. I have been very simplistic in my explanation of things mainly because I don’t know the proper names of most of the functions or locations. If you have questions, contact your local Janome dealer, they should be able to help you. If you don’t have any luck with them, send me an e-mail: Marcia@pepperedhearth.com and I will see if I can help you – no promises though.
